Ashley and Micah English
  • Home
  • About Us
    • Micah Thomas English
    • Ashley Karen English
    • Benjamin Micah English >
      • 0-2 Months
      • 2-4 months
      • 5-6 Months
      • 7-8 Months
      • 9-10 Months
      • 11 Months
    • Kalyn E. English >
      • 0-2 Months
    • Altier
    • Flynn
    • Shade
    • Raven
    • Shadowfang
    • Past Pets >
      • Tessie
      • Rascle
      • Eve
      • Gunner
  • Journal
    • Homes >
      • Kenora >
        • Our House: Plans
        • Our House: Work
      • Thunder Bay
      • Winnipeg
    • Blog >
      • What's New (2020) >
        • What's New (2019)
        • What's New (2018)
        • What's New (2017)
        • What's New (2016)
        • What's New (2015) >
          • Journals (2015)
        • What's New (2014) >
          • Journals (2014)
        • What's New (2013) >
          • Journals (2013)
    • Temples Visited
    • Infertility Struggles >
      • What Not to Say to Childless Couples
    • Photos >
      • Photos (2016)
      • Photos (2015)
      • Photos (2014)
      • Photos (2013 and earlier)
      • Pet Photos
    • Micah's Writings >
      • Poems
      • Songs
      • World Events and Politics
    • Micah's Music
    • Exercise
    • Recipes >
      • Healthy Eats
      • Soup, Salad and Sandwiches
      • Ground Meat Meals
      • American
      • Italian
      • Desserts >
        • Cakes
        • Cookies
        • Pies
        • Squares
        • Other
    • Traditions
  • The II
    • Church
    • Movies >
      • Movie Reviews (2018)
      • Previous Movie Reviews
      • The Grading Scheme
      • Favourites >
        • Best Guy Movies
        • Best Girl Movies >
          • Hall of Fame >
            • Movies of the Year
            • You Have to See This
            • Good For A Rainy Day
            • Not Worth Seeing
        • Our Favourite Movies
        • YouTube Hall of Fame
    • Games >
      • Game Reviews >
        • Game Reviews (Early Access) >
          • Creativerse
          • Folk Tale
        • Game Reviews (2014) >
          • Banished
          • Divinity: Original Sin
          • Dragon Age: Inquisition
          • Endless Legend
          • Might and Magic X: Legacy
        • Game Reviews (2013) >
          • Dead Island: Riptide
          • Fire Emblem: Awakening
          • Gears of War: Judgment
          • The Banner Saga
        • Game Reviews (2012) >
          • Diablo 3
          • Farcry 3
          • XCOM: Enemy Unknown/Enemy Within
        • Game Reviews (2006) >
          • Company of Heroes
        • Game Reviews (1997) >
          • Final Fantasy VII
      • Guides/Walkthroughs >
        • DIVINITY ORIGINAL SIN EE
        • Battle Brothers
        • Fire Emblem: Awakening
        • Mount and Blade: Warband Viking Conquest
      • Favorite Games >
        • Best Co-op Games
        • Best RPG's
        • Best FPS's
        • Best Board Games
        • Other Good Games
      • Gaming World >
        • Gaming Pictures
        • Gaming Blog
    • Music >
      • Music Reviews (2015) >
        • Music Reviews (2014)
      • Lifehouse >
        • No Name Face
        • Stanley Climbfall
        • Lifehouse
        • Who We Are
        • Smoke & Mirrors
        • Almeria
      • Best Soft Music
      • Best In Between Music
      • Best Hard Music
      • Our Wedding Music
    • Books >
      • Book Reviews (2016) >
        • Book Reviews (2015)
        • Book Reviews (2014)
        • Book Reviews (2013)
      • Favourite Writings
      • Best Religious Books
    • TV Shows

1. Introduction

3/21/2018

2 Comments


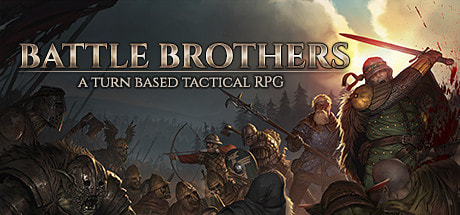
Understanding Battle Brothers

​Battle Brothers is a pain in the♥♥♥♥♥ Period. Moderators are crazy and will ban you at the slightest HINT you have an issue with the game. Fan boi's will shred you in the forums, providing no helpful critique while simply telling you to "git gud sun" as though that is the tell all for the game. Guides for the game are brutally over complicated while somehow managing to be completely uniformative and outdated. The game is riddled with flaws, glitches, RNG where there shouldn't be and learning curves that end with a "game over" with you forced to restart and try again.
 
So why play this POS?
 
To be honest half the time I am playing out of spite (I'll get to that in more detail later), most of the time I am not having fun, and the rest of the time I am left wondering what the game COULD have been if it had any REAL leadership in the development team.
 
So ... why play this POS?
 
Turn based games happen to be some of my favorite games, if there were better turn based games around that I haven't put in 1000+ hours into each I'd not be playing this game. Rogue-like seems to have infested the turn based strategy game genre and have made it their own, this is just reality now. XCOM to XCOM 2 is a perfect example of this. If you are like me and want more of a strat game and less of a rogue like game this guide will help you.
2 Comments

2. Enjoying the Game

3/21/2018

0 Comments


 My Save Files

*Saves are pre-DLC but they should still work*

People in the forums and the game itself during its "hints" will tell you "losing is fun!" and that "you really should play the game as it was meant to be played, on veteran and ironman!"

 
If you have pride issues like me, listening to this over and over again is angering and so you forge ahead into veteran ironman and proceed to get rekt.
 
Well I got news for you, you are supposed to have fun and if "losing ISN'T fun" to you (welcome to the club, you aren't a beta-male) I have just the thing to make playing veteran ironman not desireable in the slightest. My save files.
 
You heard me right, f*** this game, I'm uploading my save files for Battle Brothers on my website and you can download an ironman game at crisis #1 and another at crisis #3. I'm also uploading a save with on veteran on day 364. Why? So you can load up the games, get the hardest achievements (f*** this game and the devs) in the game and then you can focus on just playing the game to have fun. With the achievements already unlocked there is nothing to draw you into harder playstyles that just are not fun. Play my ironman saves, see how fun it is even with an amazing team, if it seems like something you would still be interested in than forge ahead.
 
Also this is where that "spite" comes into play. People in the forums trashing on newer players "to git gud sun", well guess what guys- everyone is going to get the achievements now! So all that hard work you put into being turds in the forums because you were "better"? Nah... Now EVERYONE is just as "gud" as you!​

Ironman First Crisis
File Size: 6132 kb
File Type: sav
Download File

Ironman Third Crisis
File Size: 6220 kb
File Type: sav
Download File

Black Monolith
File Size: 6079 kb
File Type: sav
Download File

364 Days on Veteran
File Size: 6094 kb
File Type: sav
Download File

Save Scum

*After DLC a lot of these no longer work*

Save scumming can and will make your life a LOT easier (even on ironman). There are a few types of save scumming that you need to know about: 


1. Alt-F4 : doing this mid battle will shut down Battle Brothers. What this means is that if you are playing Ironman and get into a fight that has turned sour or it starts you in a terrible location you can crash the program and load your Ironman save which will be directly BEFORE the battle took place. This will be your only real save scum option in ironman.

2. Saving before a battle AND after: this should be obvious but you can save, go into battle, see what is up, retreat from battle and then load your save. Very useful. Also, when you win a battle don't forget to save. The game will autosave when you go into battle and if you retreat/lose the battle but WILL NOT autosave if you win the battle. Yep, another "f*** you" from the devs. I say "f*** you" right back at ya.

 3. Save scumming recruits: this one I haven't seen posted anywhere on the web so I am the first to share this so pay attention. The very first time and ONLY the very first time you visit a settlement for the FIRST TIME, you can save scum the recruits. When your game starts when you hover over a settlement it will say "have not visited yet", this will let you know what I mean.

 a. Travel to the settlement BUT DO NOT ENTER THE SETTLEMENT, just walk on top of the settlement (if you ENTER the settlement you have screwed this up) this can easily be done by clicking on the other side of the settlement and travelling across it. Once your icon is OVER the settlement pause the game (space bar) and save your game (HARD SAVE).
 b. Now that you have a hard save enter the settlement. Once you have entered the settlement click on "recruits". Now exit all the way back to the world map. Click F5 for a "QUICKSAVE".
c. Now enter the settlement again and buy EVERY recruit (if you can), if you can't just buy the desired recruits (section found later in guide for selective recruits). Exit until the world map and check out your recruits. If there is one that is desirable (once again, found later in the guide) load your QUICKSAVE file, go back into the settlement and ONLY recruit THAT follower. If there is not a desirable recruit load your HARD SAVE file and start back at step "b". Repeat until you get desired recruit.

 4. Save scumming recruits later: if you have already been in a settlement the above tactic won't work, but that doesn't stop you from saving and then buying recruits later in the game to see what their stats are before loading your save file. Save, recruit all the followers you wish to check out, check out stats, load save file, only recruit people with desired stats (if any) and move on.

 5. Save scum enemy equipment: You want a specific weapon? It is all random what the enemies will spawn with when the battle starts so save, go into battle, check out equipment of enemies, retreat and reload if the desired weapons are not there. Very useful when fighting unique enemies that can spawn legendary items.

 6. Save scum random camps: the loot you get from a camp is random. Tedious but at the same time annoying when you have a hard fight only to get some food from the random camp. Save, fight the fight, see what the loot is, reload if total crap and fight wasn't TOO bad.
​

 7. Save scum random events: when a random event happens if you have luckily saved recently you can load that save and move around a bit until another random event happens. You can then save scum until the desired event occurs (direwolf armor, masterwork bow, etc.)
0 Comments

3. Choosing A Map

3/21/2018

2 Comments

 
Not all maps are equal. Not even close. What makes a good map?
 
1. Swamps and Forest towns: Cultists and Wildmen are two of the best recruits in the game. Period. They spawn in forest and swamp towns. The more the better even if you are save scumming.
 
2. Closeness of Cities: maps with close cities vs maps with far apart cities you will find by day 75 you are worlds apart- money, exp, everything. If you have a tight pack circle of cities that belong to the same faction it will make things A LOT easier. If you zoom in and can't see at least five cities your map is crap. Zooming in and seeing ten cities in a circle means amazing map.
 
3. ​Forges, Blast Furnace, etc.: Your castles will have these sometimes and they mean better items to buy. Some people swear by these but I found that getting 55K (for unique armor) was no small feat to reproduce over and over again and so having multiple good set ups it just meant I SAW more awesome red items but was unable to buy them. This is an EXTREME late game bonus. IMO you need to have a couple of these set ups but unless you are planning on playing a map between 365-1000 days it shouldn't be a top priority.

4. Starting Brothers: You start with three, but they are all not created equal, not by a long shot. Most important of the three is your crossbow brother (most commonly called) as he is the most likely to be taken to the end game, the other two need some amazing rolls + a lot of traits to make them worthy of the end game.
a. Most important traits for crossbow: Eagle Eyes ***, Strong **, Iron Lungs**, Bright*
b. Most important traits for the other two: Strong ***, Dexterous**, Sure Footing **, Iron Lungs **

5. Survivability of towns: During invasions and escort missions the more troops that float around the better. Barracks, wooden towers etc spawn them. Also, the connectivity of roads means faster travel as well as connectivity for ally troops to make it to the city.

6. Trade items: Quality wood is a must (IMO) because finding unique bows/crossbows seems to be BY FAR the hardest to come by and quality wood is needed. If your map doesn't spawn with a "lumber yard" next to a settlement it is strong negative in my view. Everything else is just valued based on its actual value with things like gems costing a lot but also giving the best profit. If your map has a lot of high end value trade-able items to sell it is good, if it has none or very little it is bad.
 

Best Maps- Pre-DLC

These maps are completely different after installing the DLC.
​#1. 7b591d
Picture
1. A: Map has two swamps, four forests and lots of hybrids.
2. B+: Red has four cities tight, yellow has 8 tight, black has 5 wide
3. C+: Map has surface iron vein, ore smelter attached to large city, ore smelter and blast furnace attached to fortification, ore smelter and blast furnace attached to a citadel
4. A: Spear Bro: athletic, fearless Axe Bro: quick, pessimistic Crossbow Bro: eagle eye and strong
5. B-: Map has one barracks, militia barracks, three stone watchtowers, two wooden watchtowers. Other than a couple cities in the center of the map which are surrounded by forests during the Undead Invasion the map is relatively defendable. The only large drawback is the large spread of black.
6. B+: Map has fur, salt, lumber, peat, amber, and dye. The yellow faction comes with 4 of the 6 tradeable items and is in a tight circle.

Conclusion: A
There are a lot of good things happening on this map and not a single fatal flaw.
​#2. 55f1d9
Picture
​1. A: 2 swamp towns,  2 forest towns, plus some other hybrid settlements that can spawns wildmen as well as cultists
2. B: the white faction extremely spread out, the black faction is small with medium spread, red faction is solid with 7 cities in tight circle.
3. A: Two citadels with ore smelter and blast furnace, one stone keep with ore smelter, one small fortification with blast furnace
4. A: Spear Bro: strong, dexterous, Axe Bro: strong, iron lungs, Crossbow Bro: eagle eye
5. D: one city with no road in the mountains, another city in the swamp- both easily fall during invasions. The map has three wooden towers, one barracks, two stone watchtowers. Two wooden and one stone tower are in a tight three city pack for red which is the only defensible place. A barracks and a stone tower protect the black capital which is so isolated it almost never comes under attack. Every other city is vulnerable.
6. C+: Map comes with fur, lumber, peat pit, amber, dye, and cloth but nothing in large quantities. 


Conclusion: A-
A great map to start out on. Has THE best overall starting brothers I've seen on any map. The crossbowman specs into a perfect Master Archer and the two melee's spec into great Swordmasters, all of which are solid end game material. Has a lumber yard and enough trade items (dye) to make a great amount of coin. The cities being spread out and one being in the mountains without a single road are its biggest draw backs. It has enough forges and blast furnaces etc. to make it work but nothing special.

​#3. 1339d9
Picture
1. C+: Map has one forest, one swamp, and a lot of hybrids.
2. A-: Red has 7 cities, 5 in a tight pack and the other two off near each other. White has 4 cities in a medium spread. Black has 6 in a tight spread. 
3. A: Map has a two citadels with blast furnace and ore smelter, fortification with an ore smelter, and a surface iron vein. 
4. B: Spear Bro: gluttonous, brave Axe Bro: fearless Crossbow Bro: nothing
5. A+: Map has one barracks, four wooden towers, three stone towers, one militia barracks. Lots of friendly troops travelling roads with the most exposed cities both being citadels.
6. B-: Map has peat, lumber, dye, amber, cloth. There are a ton of dye and amber on a route connected by ports.

Conclusion: B+
Overall one of the best maps found. Average starting bros with one fighting bro (Ivar) who comes with fearless and can build into an end game Zweihander. Multiple good spreads of cities. Two citadels with ore smelter and blast furnace attachments. Plenty of trade. Comes with lumber yard. And comes with a ton of wooden/stone watchtowers, barracks etc
​#4. 8fa3d4
Picture
​1. A+: three swamps, three forests plus hybrids
2. C+: Red has 6 cities in a tight spread but 2 are separated by water and one by mountains. Green has five in a tight spread. White has 6 in a wide spread. 
3. B-: Map has a citadel with ore smelter, large city with ore smelter and blast furnace, two surface iron veins, fortification with blast furnace 
4. C-: Spear Bro: irrational Axe Bro: nothing Crossbow Bro: spartan
5. C-: Map has three wooden towers, two militia barracks, two stone towers. Three cities are not accessible by road and the white is extremely spread out. 
6. B+: Map has amber, peat, wool, lumber, furs, copper. What the map doesn't have in expensive trade makes up for in quantity. For example, there are 4 peats in a tight area, all of which can produce 3 each (sell for a profit of 20 +  gold a piece= 20 x 12 = 240 gold a run) which is amazing early game. 

Conclusion: B
Starting bros are average. Cities are average. The amount of swamp and forest towns (ie. Cultists and Wildman) and their spread (10+) are phenomenal. Amazing early game trade with tons of cheap trade items available. Comes with lumber yard. 
​#5. 958fae
Picture
​1. C-: one swamp, one forest plus a few hybrid cities
2. B-: Black faction has medium spread of 6. Green has a medium spread of 6. Black and green combined have a medium spread of 12 in a tight area. Red has 6 cities extremely spread out.
3. A+: Map has two surface iron veins, one citadel with blast furnace and ore smelter, large city with blast furnace, and fortification with ore smelter
4. A: Spear Bro: iron lungs Axe Bro: tough, iron lungs Crossbow Bro: iron lungs, dexterous
5. D: 3 wooden towers, 3 stone towers, two barracks, two militia barracks. There are four cities with only a single road going into them. Multiple cities exposed to wilderness with zero protection. Red is completely indefensible. That being said, there is a tight knit group of 6 cities surrounding the mountains where you spawn at the beginning of the game that is pretty much impervious.
6. D: Map has amber, dye, copper, cloth, peat, fur. Does not come with lumber and nothing else comes in high amounts.

Conclusion: B-
Another easy map, the crossbowman can even spec into an arbalester very well. The spear bro can be a viable end game sergeant and the axe bro can be a viable zweihander. Cities are amazingly close at the bottom with a simple but solid trade. Lots of easy caravan missions with a lot of solid settlements attached to surface veins which means lots of chances for solid loot. Lots of drawbacks to this map with the biggest drawback being it doesn't have any lumber. Also, it has the "black clan" which means I get some of my favorite colored armor.

Best Maps (Post DLC)

Objectively the best

How do I make sure the maps are objectively the best? I use a standardized grading scale for each 6 points.

1. Cities

This has to do with recruitment. A lot of the best people in the game ie. witchhunters, sellswords, hedgeknights etc will spawn in citadels which will always appear on the map. Other useful classes such as hunter, wildman, cultist, raider etc are not guarenteed to have solid spawning points. Swamp towns, Forest towns, towns with a Hunter's cabin attached and Harbors spawn these useful classes. 

2. Countries

Having cities tight means less time wandering aimlessly, quicker and more fruitful trade routes and also easier to increase areas opinion of you which is extremely important (if they like you, you buy for less and sell for more). There are also some quests such as patrol which require at least 3 cities so kingdoms with 3 or less will not spawn these quests. These are some of the best quests as they in theory pay you to go plunder camps. Any of the end game crisis' will be made more difficult with countries vastly outnumbering other countries. So in conclusion a tight pack of cities is important for each faction and factions being roughly equal strength is important.

3. Merchants

More important than most other things on a map save for countries and cities is"are there things to buy on the map with my money?" If there is a ton of trade and you are worth millions of dollars but you can't find good recruits or good items to buy what's the point? The best items spawn in citadels with a blast furnace and ore smelter attached. Next is large cities and stone keeps with blast furnace and ore smelter. The grading is scaled with the the things providing the best items worth the most.

4. Starting Bros

Recruiting can be a pain and now with the elimination of save scumming recruits it is even more of a pain. You can edit your bros (I'll get to that later) but if you are not interested in doing that, having 3 bros that have the potential to go into the end game means 3 less needed recruits. Spear Bro builds best into the Sergeant ("Banner Man"), the Axe Bro builds best into the Zweihander and the Crossbow Bro builds best into Master Archer. Because of that there are certain traits they can spawn with that can help them greatly or hinder them greatly. Depending on how much the trait hurts or helps them towards their build is how they are scored.

5. Military

You will find on some maps you seem to be swarmed with raiding parties and end game crisis' will wipe out cities. This is almost entirely tied to the military presence of the map. More things that spawn more friendly troops mean less danger. This also provides more friendly units in the world to help you cheese enemies (ie. drag fights into allies). 

6. Trade

This one is simple, it is the amount of trade-able items and their worth on the map. Having one gem and one gem only isn't even half as effective as having  4 salt etc.

How to Grade each Map

1.Cities
Harbor: 1 point
Forest City:1 point
Swamp City:1 point
City + Hunter’s Cabin:1 point
 
12+: A+
11: A
10: A-
9: B+
8: B
7: B-
6: C+
5: C
4: C-
3: D+
2. Countries
Starting Score is 10

Per Faction:
6+ tight: 0
5+ tight: -0.2
4+ tight: -0.4
3+ tight: -0.8
2+ tight: -1.6
 
6+ cities: 0
5 cities: -0.2
4 cities: -0.4
3 cities: -0.8
2 cities: -1.6
1 city: -3.2
 
A+: 9.6-10
A: 9.4
A-: 9-9.2
B+: 8.6-8.8
B: 8.4
B-: 8-8.2
C+: 7.6-7.8
C: 7.4
C-: 7-7.2
D+: 6.6-6.8
D: <6.4

3. Merchants
Citadel + Ore + Furnace: 1.5
Citadel + Ore/Furnace: 0.75
Large City + Ore + Furnace: 1
Large City + Ore/Furnace: 0.5
Stone Keep + Ore + Furnace: 1
Stone Keep + Ore/Furnace: 0.5
Keep + Ore +Furnace: 0.5
Keep + Ore/Furnace: 0.25
Surface Iron Vein: 0.25
Leather Tanner + Citadel/Keep/City: 0.25
Arrow + Citadel/Keep/City: 0.25
 
6.25: A+
6.0: A
5.75: A-
5.50: B+
5.25: B
5.0: B-
4.75: C+
4.25: C
3.75: C-
3.50: D+
<3.0: D 
4. Starting Bro
Starting Score 7.5
 
A+: 9.75+
A: 9.5
A-: 9-9.25
B+: 8.75
B: 8.5
B-: 8-8.25
C+: 7.75
C: 7.5
C-: 7-7.25
D+: 6.75
D: 6.5
D-: 6.25 or below

See file below for what to add or subtract for starting traits
Traits
File Size: 399 kb
File Type: docx
Download File

5. Military
Wooden tower: 1 point
Stone tower: 2 points
Militia Barracks: 1 point
Barracks: 2 points
 
18+: A+
17: A
16: A-
15: B+
14: B
13: B-
12: C+
11: C
 

6. Trade
Gems: 5.2
Dye: 4.0
Salt: 3.4
Fur: 3.0
Amber: 2.6
Copper: 2.2
Lumber: 1.8
Wool: 1.4
Peat: 1.0
 
48+: A+
44+: A
40+: A-
36+: B+
32+: B
28+: B-
24+: C+
20+: C
16+: C-
12+: D+
<12: D
For each map go through the 6 points to get a A+ to D for each. Add up total using the overall scale:
Overall
A+ = 0
A= 1
A- = 2
B+= 3
B=4
B-=5
C+=6
C=7
C-=8
D+=9
D= 10
Any map that has a final score between 0-10 is Godly, 10-20 is great, 20-30 is good and 30+ isn't close.

​#1. IHQUBWILAA (9)

1. Cities: (12) (A+)
-Harbor: 4
-Forest City: 4
-Swamp City:
-City + Hunter’s Cabin: 4
 
2. Countries: (9.2) (A-)
White: 6 tight (7 total)
Black: 4 tight (4 total) -0.4, -0.4
Blue: 6 tight (8 total)

3. Merchants: (5) (B-)
-(1.5) Citadel + Ore + Furnace: 1
-(0.75) Citadel + Ore/Furnace: 1
-(1) Large City + Ore + Furnace: 1
-(0.5) Large City + Ore/Furnace:
-(1) Stone Keep + Ore + Furnace:
-(0.5) Stone Keep + Ore/Furnace: 1
-(0.5) Keep + Ore +Furnace:
-(0.25) Keep + Ore/Furnace: 1
-(0.25) Surface Iron Vein: 1
-(0.25) Leather Tanner + Citadel/Keep/City:
-(0.25) Arrow + Citadel/Keep/City: 3
 
4. Starting Bros: (10.25) (A+)
Spear: strong, fearless 0.5, 0.75
Axe: huge, brute 0.5, 0.5
XBow: tough 0.5
 
5. Military: (17) (A)
-Wooden tower: 4
-Stone tower: 4
-Militia Barracks: 3
-Barracks: 1
 
6. Tradeable Items: (44.6) (A)
              -(5.2) Gems: 1
              -(4.0) Dye:
              -(3.4) Salt: 2
              -(3.0) Fur: 4
              -(2.6) Amber: 5
              -(2.2) Copper: 1
              -(1.8) Lumber: 3
              -(1.4) Wool:
              -(1.0) Peat:

Master LIst 

Here is a text document of all scored map seeds. Use Ctrl F to see if your map has already be scored. If you have a map seed that hasn't been graded and you think it has a chance drop a comment with the map seed.
Scored Map Seeds
File Size: 44 kb
File Type: docx
Download File

2 Comments

4. Recruits and Recruiting

3/21/2018

0 Comments

 
Who to recruit in Ironman:​

Early Game: 0-50 days

Only hire Brawler, Cultist, Gravedigger, Poacher, Wildman

*Bowyer (only need one, keep firing until you find a useful one)
*Tailor (only need one, keep firing until you find a useful one or direwolf armor becomes outdated)
*Historian (only need one, keep firing until you find a useful one)
*Caravan Hand (only need one, keep until he upgrades your inventory size or keep firing until you find a useful one)

Mid Game: 50-100 days 

You can start hiring Militia, and Witchhunter in addition to above

*Always keep 1-2 spaces open in your party (18-19 total)
*Number your swordmasters, zweihanders and arbelists from best to worst using projected rolls (if not at level 11). Dismiss lower numbered people as you find better ones.

​Late Game: 100+ days

You can start hiring Adventurous Noble, Hedge Knight, Hunter, Raider, and Sellsword in addition to above
​
*Be careful not to replace lower tier background people with higher tiered slightly better people, paying twice as much for someone slightly better is not a good trade off.
Picture
0 Comments

5. Character Builds

3/21/2018

0 Comments


Footmen: 4-6 early game, 2-4 mid game, 0-2 end game

Best bets for Footmen: Anyone who you hire who does not meet minimum spec requirements for any of the below classes, and who you don’t immediately fire. If you aren't playing Ironman and save scum recruits (as described in above section "Save Scumming") then you don't need a single footmen the whole game.
 
Stats and Increases: (pre level 11 follow direction below. Post level 11 order of importance)
  1. Melee Defense: when rolls >2
  2. Melee Skill: when rolls >2
  3. Fatigue: when rolls >3
  4. Health: when rolls >3
  5. Resolve: when rolls >3  
​
Perks:
  1. Student
  2. Colossus
  3. Brawny
  4. *Weapon Mastery (Spear)*
  5. Underdog
  6. Battle Forged
  7. Recovery
  8. Rotation
  9. Shield Mastery
  10. /11. **Berserk + Killing Frenzy/ Taunt + Indomitable**
*EXPLANATION: Since your stats aren't good enough for any of the other builds chances are your melee skill isn't great. Spear gives you the highest added bonus to hit and is the most useful early to mid game weapon which is when you would have footmen. If you plan on taking a footmen into end game for whatever reason and he has high enough attack you could consider another weapon mastery. Mace and Cleavers do well against the undead and orcs, Flails and Axes versus humans and skeletons, Spears do well versus creatures and undead, and Hammers do well against armored two handed weapon users (orc warriors/chieftans/knights/hedge knights).  

**EXPLANATION: Berserk + Killing Frenzy for characters with high enough attack to make it worthwhile, Taunt + Indomitable for the rest.

Equipment:
Equipped:
  1. Spear, shield, best armor, best helmet, bandages
Inventory:
  1. Throwing Nets
  2. Dagger

​Purpose: Keep useful party members alive (especially during early to mid Ironman games). If a footmen dies shrug it off and get a new one; if a useful party member dies ALT + F4. 

The Sergeant: 1 in Party

Picture
Best bets in Iron Man for Sergeant:
  1. Solid Bet: Witchhunter
  2. Expensive Safe Bet: Adventurous Noble
  3. Cheap Low Risk Bet: Gravedigger
  4. Wildcard: Cultist/Wildman

Ssenkrad's Save Scumming Pick: Wildman, Cultist or Starting Bro
Wildman should be converted to Cultist during the course of the game (random event when you have another true cultist in your party). Wildman comes with the best base stats if rolled right.  Starting Bros are tied to the map so you can find Starting Bros with amazing stats (as with Guntram above) and since you will have them from the beginning of the game they will easily hit level 20+ by day 365.

Main Based Desired Stats and Increases:
  1. Resolve: 3* and 50+, 2* and 55+, 1* and 60+, 0* and 65+, Every level no limit
  2. Melee Skill: 3* and 50+, 2* and 55+, 1* and 60+, 0* and 65+, Every level up to 120
  3. Fatigue: 3* and 100+, 2* and 110+, 1* and 120+, 0* and 130+, Every level up to 160

Secondary Stats: (pre level 11 when health roll>fatigue roll; post level 11 order of importance)
  1. Health (no limit)
  2. Melee Defense (up to 50)
Example Recruits:
Picture
​Perks:
  1. Student
  2. Colossus
  3. Fortified Mind
  4. Gifted
  5. Rally the Troops
  6. Brawny
  7. Battle Forged
  8. Backstabber
  9. Berserk
  10. Killing Frenzy
  11. Recovery

Equipped Gear:
  1. Battle Standard
  2. Heaviest Helm
  3. Heaviest Armor
  4. Sergeant’s Sash

Inventory Gear:
  1. Dagger

Zweihander: ​5 in Party

Picture
​Best bets in Iron Man for Zweihanders:
  1. Solid Bet: Militia
  2. Expensive Safe Bet: Hedge Knights
  3. Cheap Low Risk Bet: Brawler/Farmhand
  4. Wildcard: Wildman/Cultist

Ssenkrad's Save Scumming Pick: Brawler, Wildman, Cultist, Starting Bro or Farmhand
Everything else spawns with stats too low or costs too much upkeep. Brawler, Wildman and Farmhand all easily convert into Cultist. Cultists spawn with completely random stats. Wildman always come with solid health, melee skill, fatigue and resolve but you have to make sure they spawn with solid defense as it can be extremely poor. Farmhands come with solid health and fatigue but the other stats are random and resolve can spawn extremely low (you'll want it to spawn 40+ minimum).  

Main Based Desired Stats and Increases:
  1. Melee Skill: 3* and 50+, 2* and 55+, 1* and 60+, 0* and 70, Every level up to 120
  2. Melee Defense: 3* and 0+, 2* and 5+, 1* and 10+, 0* and 20+, Every level up to 50
  3. Fatigue: 3* and 100+, 2* and 110+, 1* and 120+, 0* and 130+, Every level up to 160
 
Secondary Stats: (Start filling these post level 11 once above hit max)
  1. Health (no limit)
  2. Resolve (no limit)
Example Recruits:
Picture
Perks:
  1. Student
  2. Colossus
  3. Brawny
  4. Recovery
  5. Underdog
  6. Battle Forged
  7. Sword Mastery
  8. Reach Advantage
  9. Footwork
  10. Berserk
  11. Killing Frenzy

Equipment:
Before Battle Forged:
  1. Spear, best armor, shield, throwing net and bandages

After Battle Forged + 230 armor and helm + 2 handed sword:
  1. Best 2 handed sword you have
  2. 230+ armor and helm
  3. Bandages
  4. Dagger and throwing net in inventory

​Does well against: Most everyone Mid to Late game
Does poor against: Most everyone Early to Mid game

Swordmaster: 2 in party

Picture
Best bet in Iron Man for Swordmaster:
​*Strong Trait is a must but is completely unpredictable. If you get the strong trait on a useful background it is a bonus*

Ssenkrad's Save Scumming Pick: Wildman or Starting Bro
Starting Bros are tied to the map so you can get some pretty amazing guys depending on what map you are playing. One of the maps listed in the Map Section has two starting bros that could build into this (would most likely have to take gifted). If Wildmen spawn with good rolls and strong they will be godly because of their naturally high fatigue, health and resolve.
 
Main Based Desired Stats and Increases:
  1. Melee Defense: 3* and 0+, 2* and 5+, 1* and 10+, 0* and 20+, Every level up to 50
  2. Melee Skill: 3* and 50+, 2* and 55+, 1* and 60+, 0* and 75+, Every level up to 120

Secondary Stats: (Pre level 11 whichever rolls highest. Post level 11 order of importance)
  1. Initiative (up to 160)
  2. Fatigue (up to 160)
* When comparing the initiative roll to fatigue roll pre level 11, double the fatigue score ie. if fatigue rolls a 2 and initiative rolls a 3, double fatigue to 4 therefore take fatigue since it is higher*​

Tertiary Stats: (when above hit limit)
  1. Health (no limit)
  2. Resolve (no limit)
​Example Recruits:
Picture
​Perks:
  1. Student
  2. Dodge
  3. Brawny
  4. Sword Mastery
  5. Underdog
  6. Nimble
  7. Battle Forged
  8. Duelist
  9. Berserk
  10. Killing Frenzy
  11. *Gifted/Dagger Mastery/Rotation/Recovery*
* EXPLANATION: Gifted is a solid choice if your swordmaster is struggling stat wise. Dagger mastery is situational as it makes him amazing at stealing loot and fighting Orc warrior/warlords. Rotation is a solid choice for added survivability. Recovery is a solid choice all around but extremely necessary versus the Undead or prolonged battles. 

Equipped Gear:
Before Sword Mastery:
  1. Best spear, best armor, best shield, dagger, net

After Sword Mastery:
  1. Replace spear with sword

After Battle Forged:
  1. Noble Sword or Unique Sword (very easy to obtain by save scumming enemy Hedge Knights)
  2. Direwolf Hide Armor , Direwolf Mail Armor or Unique Armor greater than 175 and fatigue penalty <20. Eventually your two swordmasters will be equipped with Aspect of Davkul and The Emperor's Armor respectively.
  3. Nasal Helmet with Rusty Mail/Nasal Helmet with Mail or Unique Helm with < -15 fatigue and > 250 armor. Eventually your two swordmasters will be equipped with the Glimpse of Davkul and The Emperor's Countenance respectively.
  4. Falcon/War dog before unique necklace after which you will use the Undead and Goblin necklace respectively.

Inventory Gear:
  1. Dagger

Example Post Game:
​Does well against: Multi-hit enemies such as goblin wolf riders, necrosavants, direwolf etc
Does poor against: Two handed weapon users, nets, ranged

​Master Archer: 4 in Party

Picture
Best bets in Iron Man for Master Archers:
  1. Solid Bet: Poacher
  2. Expensive Safe Bet: Hunter
  3. Cheap Low Risk Bet: Apprentice
  4. Wildcard: Bowyer

Ssenkrad's Save Scumming Pick: Bowyer, Poacher, Hunter, Starting Bro, Apprentice
As with the others above, your starting bro can be amazing and is tied to the map so as with maps listed above you can always get one with strong and eagle eyes for example. Save scumming the bowyer bow is not difficult (and unique bows are extremely difficult to find) and the bow carries his name so I like to save scum until I get a bowyer that is great. Poacher is overall the best choice as they can, unlike others classes like Hunter, Bowyer and Apprentice, be converted into a cultist. Hunters are much more expensive and cannot be converted into cultists but can spawn with godly stats. Apprentice can spawn with decent stats and gets a nice XP bonus which is very useful post level 11. 

Main Base Desired Stats and Increases:
  1. Ranged Skill: 3* and 50+, 2* and 55+, 1* and 60+, 0* and 70+, Every level up to 120
  2. Ranged Defense: 3* and 0+, 2* and 5+, 1* and 10+, 0* and 20+, Every level up to 50

Secondary Stats: (Pre level 11 whichever rolls highest. Post level 11 order of importance)
  1. Initiative (up to 160)
  2. Fatigue (up to 160)
* When comparing the initiative roll to fatigue roll pre level 11, double the fatigue score ie. if fatigue rolls a 2 and initiative rolls a 3, double fatigue to 4 therefore take fatigue since it is higher*​

Tertiary Stats:
  1. Health (no limit)
​​Example Recruits:
Picture
​Perks:
  1. Student
  2. Dodge
  3. Anticipation
  4. Bow Mastery
  5. Pathfinder
  6. Nimble
  7. Berserk
  8. Killing Frenzy
  9. Bullseye
  10. /11. *Crippling Strike + Executioner / Fast Adaptation + Overwhelm / Recover + Quick Hands*
*EXPLANATION: Crippling Strike+Executioner makes him even more deadly against the living but cements their uselessness against the undead. Fast Adaptation+Overwhelm is situational but is mostly used if you intend to spam quick shot. Recover+Quick Hands makes him usable versus the undead, less effective versus the living but still completely worthless against skeletons.

Equipped Gear:
  1. Best Bow
  2. Dark Rugged Surcoat, Blotched Gambeson or Unique Armor (with <-10 fatigue). If he has strong trait you can equip higher. 
  3. Closed Mail Coif or Unique Helm (with no penalty to vision). If he spawns with eagle eye you can equip zweihander helmet or unique helm with -1 to vision.
  4. Dog

​Inventory Gear:
  1. 1-2x Quiver of arrows
  2. Dagger/Throwing net*
*If you choose quick hands and recovery you might actually use 2x quivers in some fights, everyone else throw a dagger or net on.

Does well against: Living
Does poor against: Undead

Arbalester: 4 in Party

​Best bets for Arbalesters: 
  1. Solid Bet: Poacher
  2. Expensive Safe Bet: Hunter/Witch hunter
  3. Cheap Low Risk Bet: Apprentice
  4. Wildcard: Bowyer

Main Base Desired Stats and Increases:
  1. Ranged Skill: 3* and 50+, 2* and 55+, 1* and 60+, 0* and 70+, Every level up to 100
  2. Fatigue:  3* and 100+, 2* and 110+, 1* and 120+, 0* and 130+, Every level up to 160
​
Secondary Stats: (pre level 11 which ever rolls higher, post level 11 order of importance)
  1. Ranged Defense (up to 30)
  2. Melee Skill (up to 80)
​
Tertiary Stats: (when above reach desired number)
     1. Health (no limit)
​Example Recruits:
Picture
Perks:
  1. Student
  2. Quick Hands
  3. Brawny
  4. Crossbow Mastery
  5. Footwork
  6. Battle Forged
  7. Berserk
  8. Killing Frenzy
  9. Bags and Pelts
  10. /11.  *Axe Mastery + Throwing Mastery/ Recovery + Axe Mastery / Colossus + Anticipation*
*EXPLANATION: Colossus + Anticipation makes him even deadlier versus goblins. Recovery + Axe mastery makes him even more deadly versus undead. Axe Mastery + Throwing Mastery makes him more viable against all enemies. 

Equipped Gear:
  1. Crossbow plus equipped bolts
  2. Best armor possible
  3. Padded Flat Top Helmet, Zweihander’s Helmet or Unique Helm with only -1 vision (this changes if he has eagle eye to -2 vision penalty)
  4. War dog (invaluable against Necrosavants)

Inventory Gear:
  1. Throwing Axes or Unique throwing weapons (x2)
  2. Longaxe (range of 2) or unique equivalent
  3. War axe (range of 1) or unique equivalent

Does well against: Goblins and Orcs
Does poor against: Creatures (werewolves and nachzehrers)

Billman: 0-2 in party

​Best bets in Iron Man for Billman:
  1. Solid Bet: Witchhunter
  2. Expensive Safe Bet: Adventurous Noble
  3. Cheap Low Risk Bet: Gravedigger
  4. Wildcard: Cultist/Wildman

Ssenkrad's Save Scumming Pick: Witch hunter
Witch hunters gain a +20 resolve check versus geists which is one of the best reasons of having and using a Billman. Cultists also make good Billmen.

Main Based Desired Stats and Increases:
  1. Melee Skill: 3* and 50+, 2* and 55+, 1* and 60+, 0* and 65+, Every level up to 120
  2. Resolve: 3* and 50+, 2* and 55+, 1* and 60+, 0* and 65+, Every level up to 120*
  3. Fatigue: 3* and 100+, 2* and 110+, 1* and 120+, 0* and 130+, Every level up to 160
*Fortified mind increases resolve by 25% which means that he needs to have a base resolve of max 96 because at 120 you become immune to Geists. Also pay attention to brave and fearless which add +5 and +10 resolve on top of your base which would lower your needed base values to 91 and 86 respectively. *

Secondary Stats: (when above hit their limits)
  1. Health (no limit)
  2. Melee Defense (up to 50)*
​
​Example Recruits:
Picture
​Perks:
  1. Student
  2. Quick Hands
  3. Brawny
  4. Pole Arm
  5. Fortified Mind
  6. Rally the Troops
  7. Battle Forged
  8. Bags and Pelts
  9. Recovery
  10. /11. *Berserk + Killing Frenzy/ Footwork + Fearsome/ Gifted + Colossus*
*EXPLANATION: Berserk + Killing Frenzy to make the Billman more effective against the Undead- choose if you are struggling against the Undead. Choose Footwork + Fearsome to make the Billman more effective against Orcs- choose if you are struggling against the Orcs and plan on using two Billman and two Arbalesters versus Orcs compared to four Arbalesters. Choose Gifted + Colossus as a last ditch effort if your Billman's stats are terrible.

Equipped Gear:
Before Battle Forged:
  1. Shield
  2. Heaviest Helm
  3. Heaviest Armor
  4. War Dog (for necrosavants)
Inventory: 
  1. Highest damage 2 distance weapon*
*If you have another item in your inventory and a one handed weapon on him you won't be able to switch to your 2 handed weapon. Keeping his hand free allows you to keep a net in your inventory, if you put a spear in his hand make sure the other inventory space is empty. Personal preference goes to net.

After Battle Forged >230 armor and helm
  1. War Scythe (when you pick one up)
  2. >230 Helm 
  3. >230 Armor
  4. War Dog (for necrosavants)
Inventory:
  1. Throwing net x2

After Bags and Pelts:
  1. War Scythe (when you pick one up)
  2. >230 Helm 
  3. >230 Armor
  4. War Dog (for necrosavants)
Inventory:
  1. Highest damage Polearm (Billhook or unique)
  2. Goblin skewer (for Necrosavants)
  3. Throwing net x2

Does well against: Necrosavants, Geists, Undead Priests
Does poor against: Ranged

hedge Knight: 0-2 in Party

​Best bets in Iron Man for Hedge Knights:
  1. Solid Bet: Militia
  2. Expensive Safe Bet: Hedge Knights
  3. Cheap Low Risk Bet: Brawler/Farmhand
  4. Wildcard: Wildman/Cultist

Ssenkrad's Save Scumming Pick: Brawler, Wildman, Cultist, Starting Bro or Farmhand
Everything else spawns with stats too low or costs too much upkeep. Brawler, Wildman and Farmhand all easily convert into Cultist. Cultists spawn with completely random stats. Wildman always come with solid health, melee skill, fatigue and resolve but you have to make sure they spawn with solid defense as it can be extremely poor. Farmhands come with solid health and fatigue but the other stats are random and resolve can spawn extremely low (you'll want it to spawn 40+ minimum).  

Main Based Desired Stats and Increases:
  1. Fatigue: 3* and 100+, 2* and 110+, 1* and 120+, 0* and 130+, Every level up to 160
  2. Melee Skill: 3* and 50+, 2* and 55+, 1* and 60+, 0* and 70, Every level up to 120
  3. Melee Defense: 3* and 0+, 2* and 5+, 1* and 10+, 0* and 20+, Every level up to 50
 
Secondary Stats: (Start filling these post level 11 once above hit max)
  1. Health (no limit)
  2. Resolve (no limit)

Example Recruits:
Picture
​Perks:
  1. Student
  2. Colossus
  3. Brawny
  4. Recovery
  5. Underdog
  6. Battle Forged
  7. Hammer Mastery
  8. Reach Advantage
  9. Fearsome
  10. /11. Berserk + Killing Frenzy / Indomitable + Overwhelm

Equipment:
Before Battle Forged:
  1. Spear, best armor, shield, throwing net and bandages

After Battle Forged + 230 armor and helm + 2 handed hammer:
  1. Best 2 handed hammer you have
  2. 230+ armor and helm
  3. Bandages/Orc Necklace
  4. Dagger and throwing net in inventory

​Does well against: Humans and Orcs
Does poor against: Goblins and Undead
0 Comments

6. Enemies

3/21/2018

0 Comments


Beasts

Direwolves
Picture
​Builds that do the best against Direwolves:
#1.
Picture
#2.
Picture
#3. Billman
​Builds that do the worst against Direwolves:
#1. Hedge Knight
#2.
Picture
Nachzehrers
Picture
​Builds that do the best against Nachzehrers:
#1.
Picture
#2.
Picture
#3.
Picture
#4. Billman
​Builds that do the worst against Nachzehrers:
#1. Hedge Knight
Lindwurm
Picture
​Builds that do the best against Lindwurms:
#1.
Picture
#2. Arbalester
​Builds that do the worst against Lindwurms:
#1.
Picture

Humans

Human Duelist:
Sergeant, Swordmaster
Picture
Builds that do the best against Human Duelist:
Builds that do the worst against Human Duelist:
Human Ranged: 
Brigand Poacher, Brigand Marksmen, Militia Marksmen, Arbalester, Master Archer
Picture
Builds that do the best against Human Ranged:
Builds that do the worst against Human Ranged:
Human Light:
Brigand Thug, Brigand Raider, Footman, Billman, Standard Bearer, Caravan Hand, Caravan Guard, Peasant, Zweihander, Militia. Militia Veteran, Militia Captain
Picture
Builds that do the best against Human Light:
Builds that do the worst against Human Light:
Human Heavy:
Hedge Knight, Knight, Brigand Leader 
Picture
Builds that do the best against Human Heavy:
Builds that do the worst against Human Heavy:
Human Hybrid:
Mercenary, Bounty Hunter
Picture
Builds that do the best against Human Hybrid:
Builds that do the worst against Human Hybrid:

Orcs

Orc Young
Picture
Builds that do the best against Orc Young:
#1.
Picture
#2. Arbalester
#3. Hedge Knight
#4. Billman
#5.​
Picture
Builds that do the worst against Orc Young:
#1.
Picture
Orc Warrior
Picture
Builds that do the best against Orc Warrior:
#1. Hedge Knight
#2.
Picture
#3. Arbalester
​Builds that do the worst against Orc Warrior:
#1.
Picture
#2.
Picture
#3.
Picture
Orc Berserker
Picture
Builds that do the best against Orc Berserker:
#1.
Picture
#2. Arbalester
#3.
Picture
#4. Billman
#5. Hedge Knight
​Builds that do the worst against Orc Berserker:
#1.
Picture
Orc Warlord
Picture
Builds that do the best against Orc Warlord:
#1. Hedge Knight
#2.
Picture
#3.
Picture
#4. Billman
#5. Arbalester
​Builds that do the worst against Orc Warlord:
#1.
Picture
#2.
Picture

Goblins

Goblin Skirmisher
Picture
Builds that do the best against Goblin Skirmisher:
#1. Arbalester
#2.
Picture
​Builds that do the worst against Goblin Skirmisher:
#1. Hedge Knight
#2.
Picture
#3. Billman
#4.
Picture
Goblin Ambusher
Picture
​Builds that do the best against Goblin Ambusher:
#1. Arbalester
#2.
Picture
​Builds that do the worst against Goblin Ambusher:
#1. Billman
#2. Hedge Knight
#3.
Picture
Goblin Wolfrider
Picture
Builds that do the best against Goblin Wolfrider:
#1.
Picture
#2.
Picture
#3. Billman
#4. Arbalester
#5.
Picture
​Builds that do the worst against Goblin Wolfrider:
Goblin Overseer
Picture
Builds that do the best against Goblin Overseer:
#1. Arbalester
#2.
Picture
​Builds that do the worst against Goblin Overseer:
#1. Hedge Knight
#2. Billman
#3.
Picture
Goblin Shaman
Picture
Builds that do the best against Goblin Shaman:
#1. Arbalester
#2.
Picture
​Builds that do the worst against Goblin Shaman:
#1. Hedge Knight
#2. Billman
#3.
Picture
#4.
Picture
#5.
Picture

Undead

Armored/Regular Wiederganger
Picture
Builds that do the best against Wiederganger:
#1. Billman
#2.
Picture
​Builds that do the worst against Wiederganger:
#1. Hedge Knight
#2.
Picture
Fallen Hero
Picture
Builds that do the best against Fallen Hero:
#1.
Picture
#2. Hedge Knight
#3. Billman
​Builds that do the worst against Fallen Hero:
#1.
Picture
Necromancer
Picture
Builds that do the best against Necromancer:
#1.
Picture
#2. Arbalester
#3.
Picture
​Builds that do the worst against Necromancer:
Geist
Picture
Builds that do the best against Geist:
#1. Billman
#2.
Picture
#3.
Picture
#4.
Picture
​Builds that do the worst against Geist:
#1. Hedge Knight
#2. Arbalester
#3.
Picture

Ancient Undead

Ancient Auxiliary
Picture
Builds that do the best against Ancient Auxiliary:
#1.
Picture
#2. Arbalester
Builds that do the worst against Ancient Auxiliary:
#1.
Picture
#2. Hedge Knight
Ancient Legionary
Picture
Builds that do the best against Ancient Legionary:
#1.
Picture
#2. Arbalester
Builds that do the worst against Ancient Legionary:
#1.
Picture
#2. Hedge Knight
Ancient Honor Guard
Picture
Builds that do the best against Ancient Honor Guard:
#1.
Picture
#2. Arbalester
Builds that do the worst against Ancient Honor Guard:
#1.
Picture
#2.
Picture
#3. Hedge Knight
Ancient Priest
Picture
Builds that do the best against Ancient Priest:
#1.
Picture
#2. Arbalester
#3. Billman
#4.
Picture
Builds that do the worst against Ancient Priest:
#1.
Picture
#2. Hedge Knight
Necrosavant
Picture
Builds that do the best against Necrosavant:
#1.
Picture
#2. Billman
#3. Arbalester
#4.
Picture
Builds that do the worst against Necrosavant:
#1.
Picture
#2. Hedge Knight
0 Comments

7. Formations and Combat

3/21/2018

0 Comments


Formations: Early-mid Game

In early to mid game you are mostly only fighting humans (Brigand Thugs/Raiders), Undead (Wiedergangers/Ancient Auxillaries), Beasts (Direwolves/ Nachzehrers) and Orcs (Orc young). You shouldn’t be fighting Goblins, avoid at all costs. There are only two formations you are going to use:

Formation 1: (against Humans and Orcs)
Picture
*On Ironman these will be your meat class
​
The Shield + Spear people will be your early game Zweihanders and Swordmasters. Your Bow/XBow will be your early game Arbalesters and Master Archers.

Formation 2: (against Creatures and Undead)
Picture
*On Ironman these will be your meat class
​
The Shield + Spear people will be your early game Zweihanders and Swordmasters. Your Ranged 2 Weapon will most likely be pitchforks (early) and phase into longaxes, ideally these will be your future Arbalesters.

Formations: Mid-End Game

​Formation 1: (against Humans and Goblins)
Picture
​Formation 2: (against unknown enemies)
Picture
​Formation 3: (against Undead and Orcs)
Picture
0 Comments

8. Making Money

3/21/2018

7 Comments


Selling Items

80% of all money made in the game is made from selling loot. The difference between players who make some money and those who make a lot of money rests solely on repairing gear before selling it (Ctl + clicking on item in inventory will allow you to repair items that aren't equipped). Repairing gear costs tools and tools cost money so knowing which ones will yield a ROI is what makes that difference. Tools cost between $200-400 ($300 average) and come with 20 tools that repair 15 points of durability each. That puts the cost at $0.66-1.33 per point repaired. When selling to a settlement you can sell items between 10-30% of their value. Only sells items in large trading cities which you have good relationships with (do quests for them without bartering in the contract). Keep a fang in your inventory (found from the Nachzehrers) because they have a value of 100 which makes it very easy to tell the percentage the town is buying at (ie. If they are buying the fang from you for $17 they are selling at 17%). Try to buy tools under $300 and try to sell 15%- average conditions. Below is a chart that shows you the items that make a ROI on repairing items and selling them at average conditions.

Shields:

Item:
Picture
Name:
Decayed Heater Shield
Profit per durability repaired​:
$0.25 
Picture
Ancient Tower Shield
$0.66
Picture
Heater Shield
$0.56

Helmets:

Any helmet with a durability >150 has a chance of profit
Item:
Name:
​Profit per durability repaired:
Picture
Sallet Helmet
$2.33
Picture
Padded Flat Top Helmet
$0.07
Picture
Zweihander's Helmet
$0.13
Picture
Closed Flat Top Helmet
$0.18
Picture
Ancient Honor Guard Helmet
$0.11
Picture
​Closed and Padded Flat Top 
$0.39
Picture
Nasal Helmet with Mail
$0.25
Picture
Decayed Flat Top with Mail
$0.09
Picture
Bascinet with Mail
$0.33
Picture
Kettle Hat with Mail
$0.40
Picture
Flat Top with Mail
$0.57
Picture
Nasal Helmet with Closed Mail
$0.67
Picture
Kettle Hat with Closed Mail
$0.76
Picture
Decayed Full Helm
$0.25
Picture
Decayed Great Helm
$0.57
Picture
Flat Top with Closed Mail
$0.96
Picture
Closed Flat Top with Mail
$1.14
Picture
Full Helm
$1.33
Picture
Decorated Full Helm
$1.67

Armor:

Below is a list of non-unique armor that is worth repairing and selling.
​
Undead: any armor with durability greater than 125 
Human: any armor with durability greater than 210
Item:
Name:
​Profit per durability repaired:
Picture
Ancient Scale Harness
$0.20
Picture
Ancient Breastplate
$0.33
Picture
Leather Scale Armor
$0.14
Picture
Mail Hauberk
$0.33
Picture
Noble Mail
$2.13
Picture
Decayed Reinforced Mail Hauberk
$0.17
Picture
Light Scale Armor
$0.53
Picture
Ancient Plated Mail Hauberk
$1.22
Picture
Footman's Armor
$0.68
Picture
Reinforced Mail Hauberk
$0.90
Picture
Ancient Scale Coat
$1.53
Picture
Ancient Plate Harness
$1.80
Picture
Lamellar Harness
$1.61
Picture
Decayed Coat of Scales
$1.50
Picture
Ancient Plated Scale Hauberk
$2.05
Picture
Scale Armor
$2.33
Picture
Decayed Coat of Plates
$2.08
Picture
Sellsword's Armor
$2.46
Picture
Heavy Lamellar Armor
$2.51
Picture
Coat of Scales
$3.00
Picture
Coat of Plates
$3.38

Ranged Weapons:

Item:
Name:
​Profit per durability repaired:
Picture
Hunting Bow
$0.50
Picture
War Bow
$4.80
Picture
Reinforced Boondock Bow
$0.62
Picture
Light Crossbow
$0.50
Picture
Crossbow
$2.13
Picture
Heavy Crossbow
$9.00
Picture
Spiked Impaler
$4.56

Melee Weapons:

Daggers:

Item:
Picture
Name:
Rondel Dagger
Profit per durability repaired:
$0.60

One-Handed Swords:

​Item:
Picture
​Name:
Shortsword
​Profit per durability repaired:
$0.46
Picture
Falchion
$1.08
Picture
Arming Sword
$3.46
Picture
Noble Sword
$7.89
Picture
Fencing Sword
$5.46
Picture
Notched Blade
$0.59
Picture
Cruel Falchion
$2.46
Picture
Broken Ancient Sword
$0.67
Picture
Ancient Sword
$3.05

Two-Handed Swords:

​Item:
Picture
​Name:
Longsword
Profit per durability repaired:
$4.33
Picture
Warbrand
$4.63
Picture
Greatsword
$5.11
Picture
Rhomphaia
$5.19

Maces:

​Item:
Picture
​Name:
Gnarly Staff
​Profit per durability repaired:
$5.40
Picture
Goedendag
$0.88
Picture
Morning Star
$0.67
Picture
​Winged Mace
$4.25
Picture
Two-Handed Mace
$1.50
Picture
Two-Handed Flanged Mace
$1.67

Spears:

​Item:
Picture
​Name:
Boar Spear
​Profit per durability repaired:
$1.34
Picture
Fighting Spear
$5.94
Picture
Goblin Skewer
$0.67

One-Handed Axes:

​Item:
Picture
​Name:
Handaxe
​Profit per durability repaired:
$1.65
Picture
Fighting Axe
$6.50
Picture
Head Splitter
$2.75

Two-Handed Axes

​Item:
Picture
​Name:
Woodcutter's Axe
​Profit per durability repaired:
$0.67
Picture
Greataxe
$5.00
Picture
Longaxe
$2.33
Picture
Man Splitter
$4.00

One-Handed Flails:

Item:
Picture
​Name:
Reinforced Wooden Flail
​Profit per durability repaired:
$0.50
Picture
Three-Headed Flail
$4.33
Picture
Flail
​$2.89

Two-Handed Flails:

​Item:
Picture
​Name:
Two-Handed Wooden Flail
​Profit per durability repaired:
$0.79
Picture
Two-Handed Flail
$2.00
Picture
Berserk Chain
​$3.06

CLeavers:

Item:
Picture
​Name:
Scramasax
​Profit per durability repaired:
​$1.50
Picture
Military Cleaver
$3.75
Picture
Head Chopper
$3.62
Picture
Falx
$0.63
Picture
Khopesh
$5.19
Picture
Crypt Cleaver
$5.67

Hammers:

​Item:
Picture
​Name:
Military Pick
​Profit per durability repaired:
$1.25
Picture
Warhammer
$4.00
Picture
Polehammer
$2.00
Picture
Two-Handed Hammer
$2.33

Polearms:

​Item:
Picture
​Name:
Pike
​Profit per durability repaired:
$1.81
Picture
Hooked Blade
$1.55
Picture
Billhook
$2.89
Picture
Jagged Pike
$3.00
Picture
Broken Pike
$1.69
Picture
Bladed Pike
$3.00
Picture
Warscythe
$2.89
7 Comments

    Battle Brothers

    Builds, Formations, and Strategy Guide
    Picture

    Ssenkrad_II

    Guide Index

    All

    Introduction
    Enjoying the Game
    Choosing A Map
    Recruits and Recruiting
    Character Builds
    Enemies
    Formations and Combat
    Making Money

    RSS Feed

© Ashley and Micah English and The II, 2019. Unauthorized use and/or duplication of this material without express and written permission from this site’s author and/or owner is strictly prohibited. Excerpts and links may be used, provided that full and clear credit is given to Ssenkrad_II and The II with appropriate and specific direction to the original content.